
Table of Contents
Portrait Photo Retouching: Complete Guide for Natural Results
A portrait rarely looks the way the person actually appeared in the room. Studio lighting flattens some features and exaggerates others. A camera sensor picks up every stray hair, every patch of dry skin, every shine across the forehead that nobody in the room actually noticed at the time. None of that is dishonest, it is just how photography works. Portrait retouching is the step that brings the photo back in line with how the person actually looks and feels on a good day, not a different person, just a fairer version of the same one.
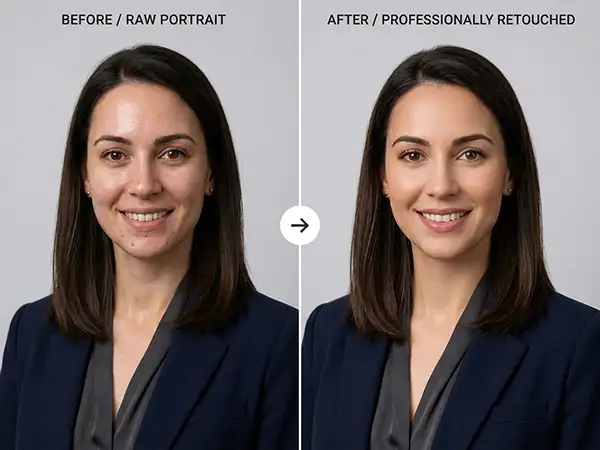
In practical terms, portrait photo retouching means correcting exposure and colour, smoothing skin without erasing its texture, cleaning up stray hair, brightening eyes, and removing small distractions from the frame. It sits one step beyond general photo editing. Editing adjusts the whole image: crop, exposure, overall colour. Retouching works on the person inside it.
Why Portraits Get Retouched
The honest answer is that cameras are not neutral. A sensor can pick up a blemish more clearly than the human eye ever would in person, because the eye is busy reading a whole face and a whole expression, while a lens just records light hitting a surface. Studio lighting, which is often harsher and more directional than the light people are normally seen in, tends to exaggerate texture, shine and shadow under the eyes.
That gap between how someone looks in person and how they look in a raw file is the actual reason retouching exists. A LinkedIn headshot represents a person’s professional presence before anyone has met them. An ecommerce brand’s team page needs to look consistent with the rest of its polished catalogue. A wedding gallery has to hold up years later, when the couple looks back at it. In each case, an unretouched blemish or an odd shadow does not add honesty, it just adds a distraction that pulls a viewer’s attention away from the actual photo.
The Order of Operations
One detail that is easy to miss until you have retouched a lot of portraits: the order you do things in matters as much as the individual techniques.
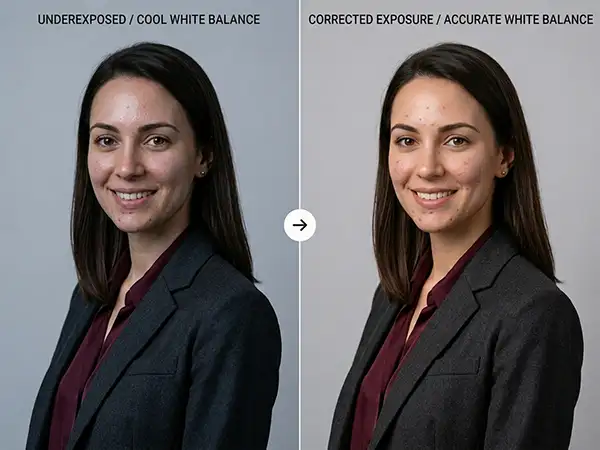
Correct exposure and colour first. If a portrait is slightly underexposed or the white balance is off, any skin work done before that correction gets pulled out of alignment once the base tones shift. Get the light and colour right, then retouch on top of a stable foundation. Doing it the other way round usually means redoing the skin work later.
Skin and Blemish Work
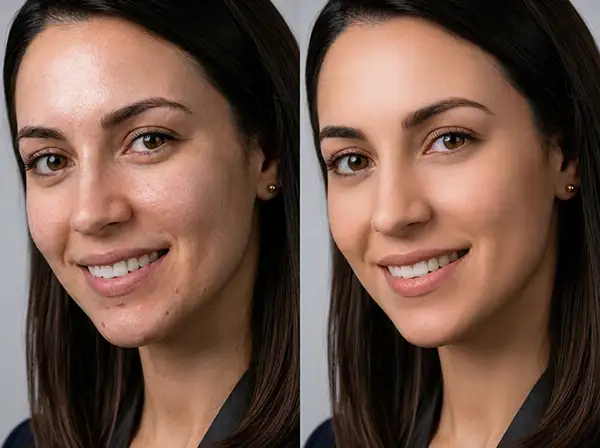
Most retouching time goes here. Basic healing and cloning handle isolated blemishes and blotches. For more even, higher end work, frequency separation is the standard advanced technique. It splits an image into a texture layer and a colour and tone layer, so a retoucher can smooth uneven skin tone without softening the texture underneath. Dodge and burn, painting in small adjustments of light and shadow, is used to even out skin without flattening its natural contours.
Eyes, Teeth and Hair
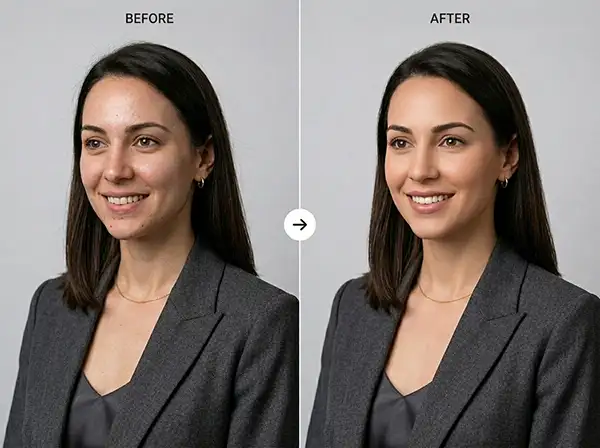
Eyes typically get a light brightening and sharpening, never a colour change unless specifically requested. Teeth are whitened by a shade or two, not bleached white, since anything more reads as obviously edited. Hair work is mostly subtraction: flyaways against a plain background, stray strands crossing the face. Reshaping features with liquify style tools is generally avoided in professional headshot and corporate work.
Clothing and Background
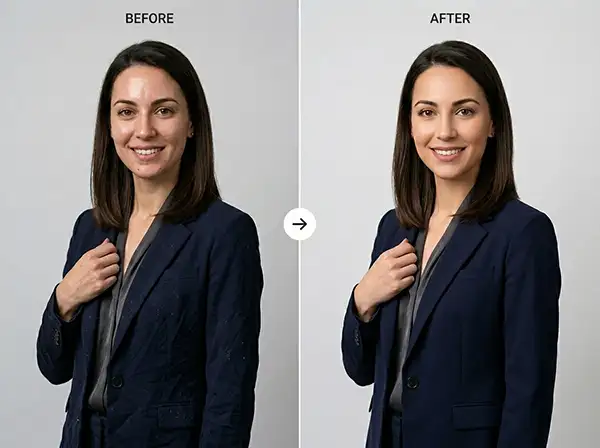
Fabric gets smoothed of obvious creases, stray threads and lint are removed, and visible logos are usually cleaned up for commercial use. Backgrounds are simplified: distracting objects removed, colour evened out if it is a studio backdrop with uneven lighting.
Finishing and Output
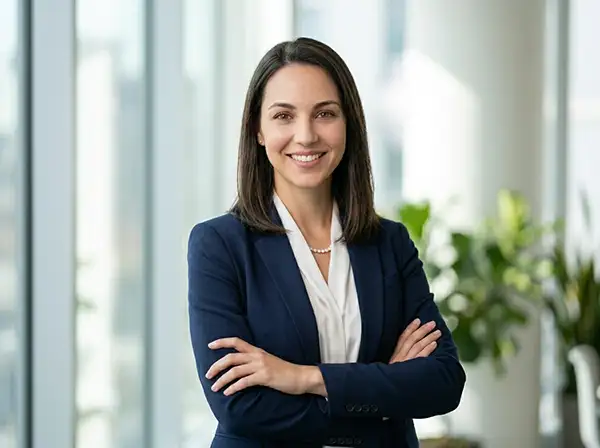
The last step is sharpening and export, and it depends on where the image is going. Web use calls for the sRGB colour space and a file size kept reasonable for fast loading. Print calls for a higher resolution file, generally around 300 DPI, and sometimes a different colour profile depending on the printer.
Techniques at a Glance
For anyone scanning rather than reading in full, these are the terms that come up most in professional portrait retouching:
- Healing and cloning: removes isolated spots, blemishes and small distractions
- Frequency separation: smooths skin tone while keeping natural texture intact
- Dodge and burn: evens out light and shadow across the skin without flattening it
- Liquify: reshapes proportions, used sparingly and rarely in headshot or corporate work
- Colour grading: adjusts overall mood and tone, more common in editorial than corporate portraits
- Batch syncing: applies consistent global adjustments across a full shoot in Lightroom
Software and AI Tools
Lightroom, or a similar RAW editor, handles global adjustments efficiently: exposure, white balance, colour grading, and batch syncing across a shoot. Photoshop is where detailed, localised retouching happens: skin work, eye and teeth touch ups, background cleanup. Most professional workflows use both, Lightroom for the broad strokes and Photoshop for the fine detail.
AI powered tools such as PortraitPro, ON1 Portrait and plugins like Retouch4me have become common for the repetitive parts of retouching, particularly skin smoothing across a large batch. They speed up the base pass considerably. What they do not reliably do is judgement: knowing when a shadow under the eyes should stay because it reads as natural tiredness rather than a flaw, or when a smoothing pass has gone too far for a particular skin tone. Most experienced retouchers use AI tools to handle the repetitive first pass, then review and adjust by hand. Treating AI as a starting point rather than a finishing tool tends to give more reliable results than relying on it end to end.
What Portrait Retouching Costs
Pricing for portrait retouching is driven less by the photo itself and more by three variables: how many images need editing, how much correction each one needs, and how quickly it is needed.
A single portrait with light colour and exposure correction is a much smaller job than a full beauty style edit involving detailed skin work, frequency separation and background cleanup. Bulk orders, a full headshot day for a company, or a wedding gallery of several hundred images, are usually priced per image with the rate dropping as volume increases, since a consistent process can be applied across the batch. Rush turnaround, same day or next day delivery, typically costs more than a standard timeline, simply because it limits how the workload can be spread across a team.
Why Revisions Are the Hidden Cost
The other real driver of cost is revisions, and it is the one most people underestimate. A vague brief, something like “make it look natural” or “fix the skin,” invites open ended revisions, because the client and the retoucher may have different ideas about what natural means for that particular image. Agreeing on the level of retouching before work starts, ideally with a reference photo or two showing the intended result, saves far more time and cost than any technique used during the edit itself.
Before and After: What to Actually Look For
A before and after comparison is the fastest way to judge whether a retouch, or a retoucher, has got it right. A good one usually shows the same pose and angle, skin that still has visible pores and texture, eyes that look brighter rather than obviously sharpened, and no warping around the jaw or nose from careless healing work. The colour should still feel consistent with the original lighting, not artificially brightened or flattened.
The warning signs are just as identifiable. Waxy or plastic looking skin, a retouched face that no longer matches the skin tone of the neck or hands in the same photo, texture that has been blurred away entirely, or features that look subtly reshaped rather than just cleaned up. When evaluating a retoucher or a service, asking to see real before and after samples, ideally across a range of skin tones and lighting conditions, tells you far more than a list of the tools they use.
Different Portraits, Different Standards
How far to take a retouch depends heavily on what the portrait is for and where it will be seen.
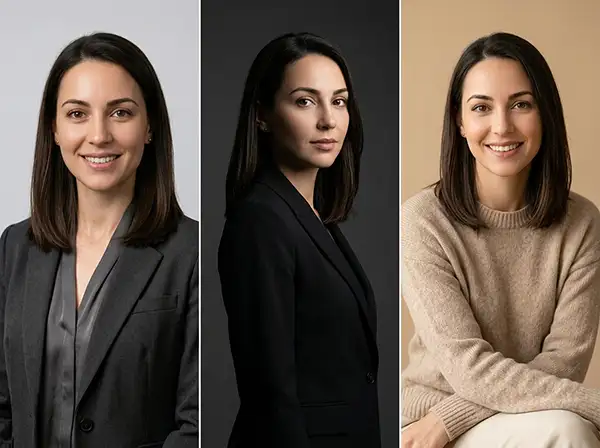
Corporate headshots and LinkedIn style profile photos call for the lightest touch. The expectation is that the person should look like themselves on a good day, not like a different person. Overt smoothing or colour grading stands out as unprofessional in this context, which is why headshot retouching tends to be the most conservative branch of the work. Editorial and fashion portraits allow more creative latitude: stylised colour grading, more pronounced skin retouching, sometimes deliberate contrast or mood adjustments that would look out of place on a corporate bio page.
This context also shapes how a viewer judges the result. A retouch that would look perfectly appropriate for a fashion campaign can look oddly artificial on a company website, and a bio photo edited too conservatively for an editorial shoot can look flat and underworked by comparison. It is worth deciding this before editing starts rather than after, since it changes how much smoothing, colour grading and detail work is appropriate for a given image.
Family and event portraits sit somewhere in between, with an added requirement: consistency across a whole set, which is its own separate challenge.
Consistency Across a Batch
Keeping a retouch consistent across many images is one of the more practical challenges in portrait work, and it is rarely covered in guides that focus on a single photo.
Syncing global adjustments across a shoot in Lightroom is the easy part. Harder is keeping the skin and detail retouching consistent from face to face, especially across different skin tones and lighting setups within the same session. A retouching preset built for one person’s skin rarely transfers cleanly to another’s. The more reliable answer is a checklist rather than a single preset: the same sequence of checks applied to every image, skin evenness, eye brightness, colour balance against a reference frame, rather than an identical numerical adjustment copied across the batch.
For anyone managing a large set, it is also worth keeping the original files and, where practical, the layered working files rather than just the final export. Requests for a different crop or a slightly different level of retouching months later are common, and starting from a flattened final image makes those requests far more time consuming than starting from the original layers.
Benefits of Professional Portrait Retouching for Businesses
For an individual, the value of retouching is straightforward: a better looking photo. For a business, the case is slightly different, and it tends to come down to four things.
Consistency across every touchpoint. A company’s website, LinkedIn pages, press materials and recruitment pages usually pull from the same set of headshots. If those images are retouched to different standards, or not retouched at all, it shows the moment they sit next to each other on a team page.
Alignment with the rest of the brand’s imagery. Ecommerce brands, fashion labels and agencies typically invest heavily in polished product photography. Team or model portraits edited to a lower standard than the product shots around them create a visible mismatch that a customer notices even if they cannot say why.
Time saved on an internal team. Retouching a portrait properly, especially with frequency separation and detailed skin work, takes real time to do well. For a marketing team already stretched across other work, that time adds up fast across a shoot of any real size.
Fewer costly mistakes at scale. A single retoucher working through a large batch is far less likely to introduce inconsistency, a missed blemish, an odd colour shift on one image out of fifty, than several people editing independently without a shared standard.
None of this replaces the earlier point about restraint. The goal is still a natural result, not a dramatically different one. The business case is really about consistency and reliability at volume, not about improving the person in the photo.
DIY or Professional Help?
Whether to retouch a portrait yourself or hand it to a professional service usually comes down to three things: the number of images, the skill ceiling required, and how much the outcome matters.
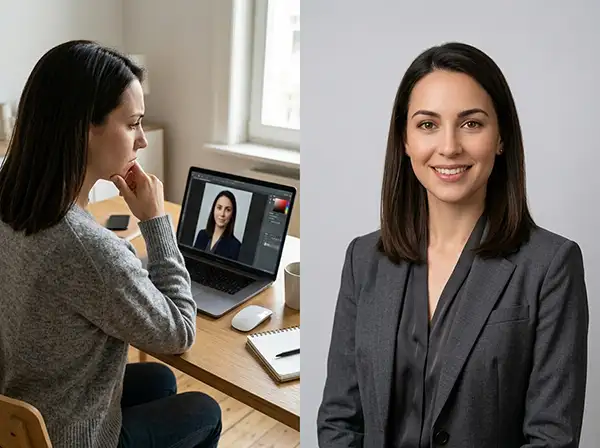
A single portrait, or a small handful, with modest adjustments such as colour correction, light skin cleanup and minor cropping, is a reasonable candidate for DIY, particularly with a decent grasp of Lightroom’s basic tools. The learning curve for frequency separation and detailed dodge and burn work is real, though, and it takes practice to get skin retouching looking natural rather than obviously edited.
Larger batches, commercial use, or images where consistency across many faces matters, corporate headshot days, product model shoots, wedding galleries, tend to justify outsourcing. A professional service set up for volume work can apply a consistent standard across dozens or hundreds of images faster and more reliably than most people can manage manually.
It is also worth checking, particularly for commercial or editorial use, whether the people photographed have agreed to how their images will be edited and used. This matters more for identifiable portraits used commercially than for personal or informal shots, but it is a detail that is easy to overlook once a retouch is already underway.
What a Portrait Retouching Service Usually Covers
A typical portrait retouching service package includes colour and exposure correction, skin and blemish work, eye, teeth and hair touch ups, background cleanup, and delivery in the file formats and resolutions needed, whether that is web ready files or print ready ones. Most services also include an agreed number of revision rounds, which is worth confirming upfront given how much revisions can add to the total cost.
For brands that are already using a photo editing service for product images, background removal or clipping path work for a catalogue, adding portrait retouching to the same order can be a practical way to keep a consistent look across product shots and a team or model page, rather than managing two separate editing standards.
Common Mistakes at a Glance
- Smoothing skin until the texture disappears entirely
- Oversharpening eyes so they look artificial rather than alert
- Whitening teeth past a natural, believable shade
- Reshaping features with liquify tools instead of light correction
- Retouching skin before exposure and colour have been corrected
- Treating AI output as a finished result rather than a first pass
In Short
Portrait retouching, done well, is not really about transformation. It is disciplined correction: fixing exposure and colour first, working skin and detail with restraint, keeping the edit invisible, and matching the level of polish to where the portrait will actually be used. The technical side, frequency separation, dodge and burn, colour space choices, can be learned. The harder part is judgement: knowing when to stop.
For a single portrait, that judgement is worth developing yourself. For a full shoot, a commercial batch, or images that need to hold up consistently across dozens of faces, a photo retouching service that specialises in this kind of detail work, Clarity Edit included, can usually get there faster and with fewer revision rounds than doing it from scratch in house.
If you would like to see this level of retouching applied to your own portraits before committing to anything, a free trial lets you send a sample image and judge the result for yourself. For a full shoot, a bulk batch, or ongoing work, a free quote is the more useful starting point, since pricing depends on volume, turnaround and how much correction each image needs.
Frequently Asked Questions
It means correcting and refining a portrait after it has been shot, rather than just adjusting the whole image. For a portrait, that usually covers skin, eyes, teeth, hair, and small distractions in the frame, done with the goal of making the edit invisible.
Because a camera sensor and studio lighting pick up things the human eye naturally filters out in person, small blemishes, shine, shadows under the eyes. A skilled photographer gets the framing, light and composition right. Retouching handles the finer details a lens exaggerates that the eye would never have noticed in the room.
Most professional workflows combine Lightroom for global, batch level adjustments with Photoshop for detailed, localised retouching. AI tools such as PortraitPro or Retouch4me plugins are useful for speeding up repetitive skin work, but they generally need a manual review pass afterwards.
AI tools are genuinely useful for the repetitive first pass, especially on large batches, but they are not yet reliable at judgement calls, knowing when a shadow should stay because it looks natural, or when smoothing has gone too far for a particular skin tone. Most experienced retouchers use AI as a starting point, not a finished result.
It depends mainly on three things: how many images need editing, how much correction each one requires, and how fast it is needed. A light colour correction on a single image costs far less than a full beauty style edit across a large batch with a rush turnaround.
If the edit is noticeable before the photo itself is, it has usually gone too far. Skin should still show some texture, eyes should look bright rather than sharpened, and features should stay in proportion. The safest guide is that a good retouch should be invisible.
This varies by provider, but it is worth agreeing on the intended level of retouching before work starts, ideally with a reference image. A clear brief upfront reduces the number of revision rounds needed far more than any technique used during editing.