
Noise Reduction Photo
Editing Service
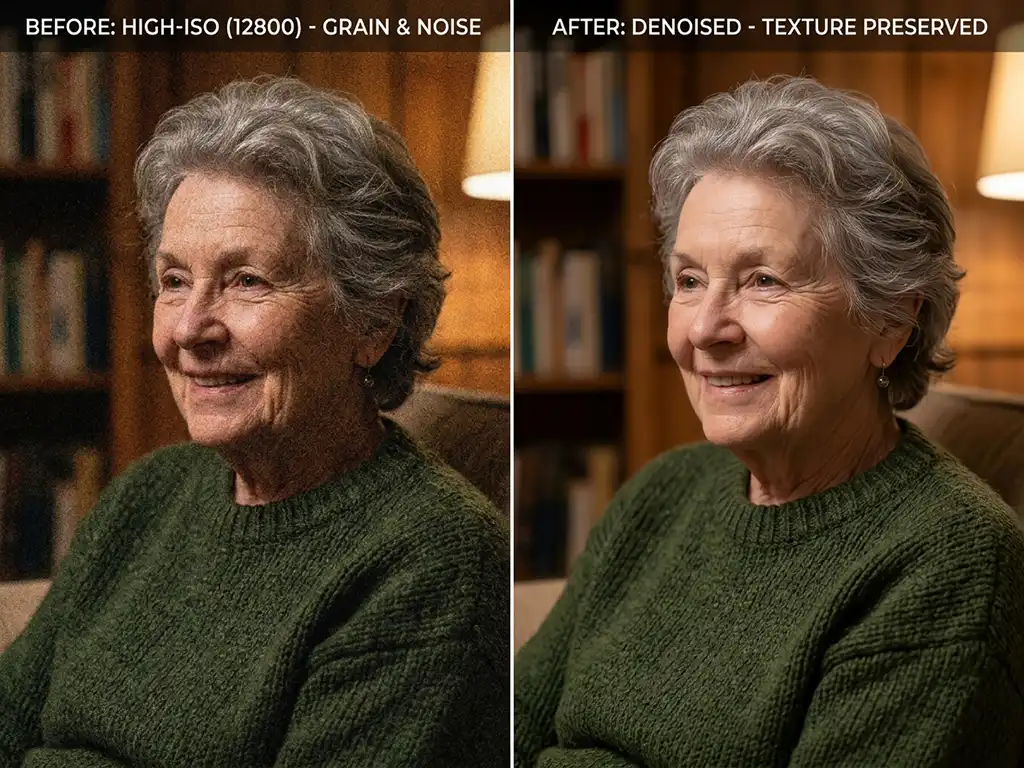
Grain and digital noise ruin otherwise excellent photos. A sharp, well-composed shot can look unpublishable when high ISO settings or low-light conditions leave the image speckled with grainy texture or random color artifacts.
Clarity Edit’s noise reduction photo editing service removes luminance grain and chroma noise by hand — without the over-smoothing that makes subjects look waxy or artificial. Every image is edited individually, not pushed through an automated filter. The result is a clean, natural-looking image that holds its detail.
What Is Noise Reduction in Photo Editing?
Digital noise is the visual interference that appears when a camera’s sensor struggles with low light. It shows up in two distinct forms.
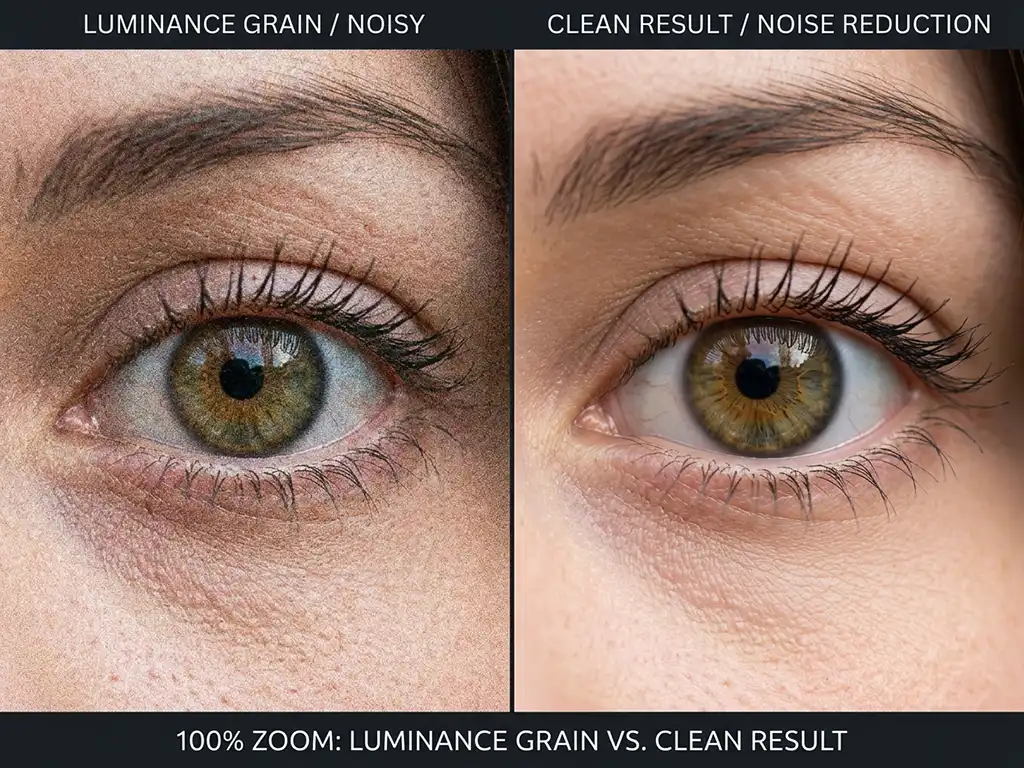
Luminance noise looks like fine grain scattered across the image — similar to film grain, but uncontrolled and inconsistent across the frame. It affects brightness rather than color, making the image look rough or textured even in areas that should appear smooth.
Color noise, also called chroma noise, shows up as random red, blue, or green specks in shadows and mid-tones. It is often more visible than luminance noise and can make a product photo look damaged or a portrait look patchy.
Both types occur most often when a camera shoots at high ISO settings, in low-light environments, during long exposures, or when using a small sensor. The challenge in fixing them is that noise and real detail occupy the same visual space. Remove too aggressively, and you strip out the texture that makes an image look natural. Remove too little, and the noise remains visible at final output sizes.
Professional noise reduction requires distinguishing unwanted noise from genuine image detail across different subjects, lighting conditions, and file formats. A human-led workflow allows a trained editor to set and refine the correction according to the image, using different treatment for smooth skin, textured fabric, product surfaces, and architectural edges. Carefully tested tools may assist suitable technical steps without replacing image-specific judgment.
Noise reduction is applied after exposure adjustment and white balance correction, and before image sharpening. This sequence matters because sharpening first can amplify grain and make clean correction more difficult. Following the correct order helps preserve detail and produce a more natural final result.
Why Choose Clarity Edit for Noise Reduction?
Human-Edited Quality
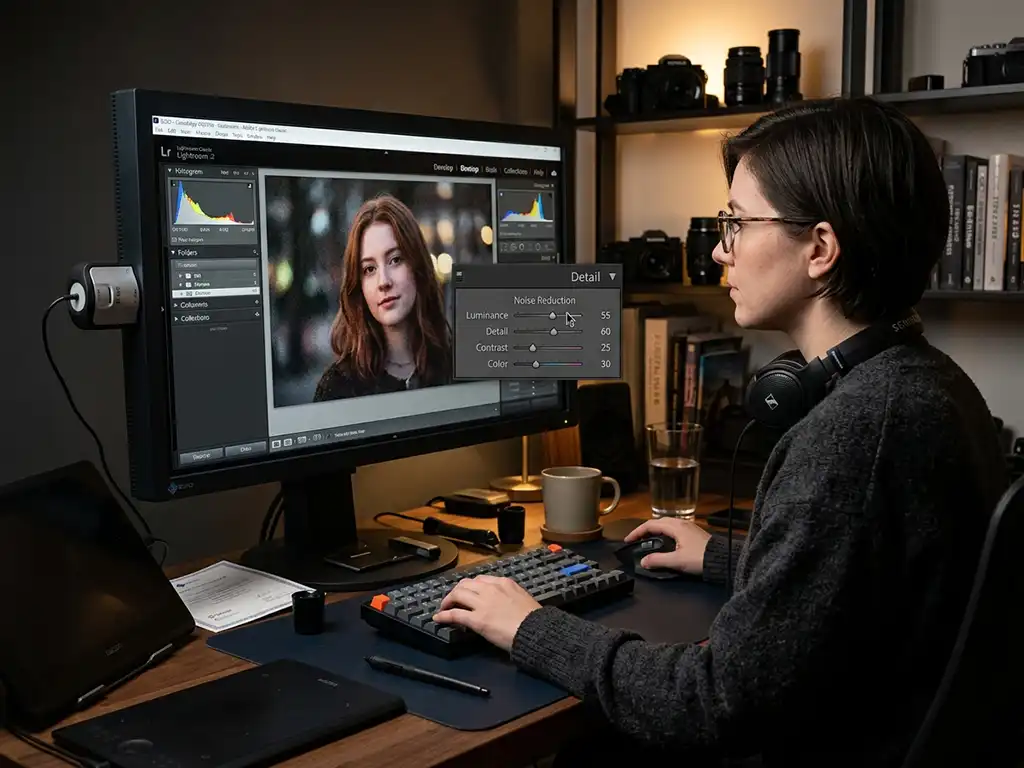
Every noise-reduction project follows a human-led workflow in Adobe Photoshop or Lightroom. A trained editor evaluates the noise pattern, subject, texture, and output requirements before deciding how strongly and where to apply correction.
Carefully tested denoising settings or AI-assisted tools may support suitable technical steps, especially in consistent batches. Their output is reviewed and refined by an experienced editor, who remains responsible for protecting real detail, controlling over-smoothing, maintaining consistency, and approving the final result.
Fast Turnaround
Standard noise reduction orders are delivered within 24 hours. Bulk image sets move through our batch workflow with a confirmed timeline agreed before work starts — not estimated after.
For high-volume orders, turnaround can be reduced to 12 hours depending on batch size and complexity. If your project has a hard deadline, tell us upfront and we will confirm whether it is achievable before you upload a single file.
Affordable Pricing
Noise reduction is included in our Volume Pro color correction plan at $0.30 per image, which covers bulk batches from 50 images and above. Individual or small-batch orders start at $0.40 per image on our Starter plan.
For agencies, large studios, and ecommerce operations with recurring volume, we offer custom enterprise pricing with dedicated support and flexible turnaround arrangements.
Accuracy and Attention to Detail
A noisy photo that looks acceptable on a phone screen can look significantly worse at print size or on a high-resolution display. We check every image against the original file before delivery — looking specifically at shadow regions, smooth backgrounds, and fine textures where noise is hardest to correct without visible side effects.
Consistency across a batch is equally important. If you submit a gallery of 300 wedding photos or a catalog of 500 product images, the correction level is kept uniform so the set reads as a single edited body of work, not a patchwork of individually adjusted files.
Secure and Confidential File Handling
Your images are uploaded through encrypted file transfer links. Files are never shared with third parties and are removed from our active systems after project completion on request. This applies to every order — individual, bulk, and enterprise.
If your business handles sensitive product photography or client images under NDA, we are equipped to work within those requirements.
Types of Noise Reduction We Offer
Luminance Noise Reduction
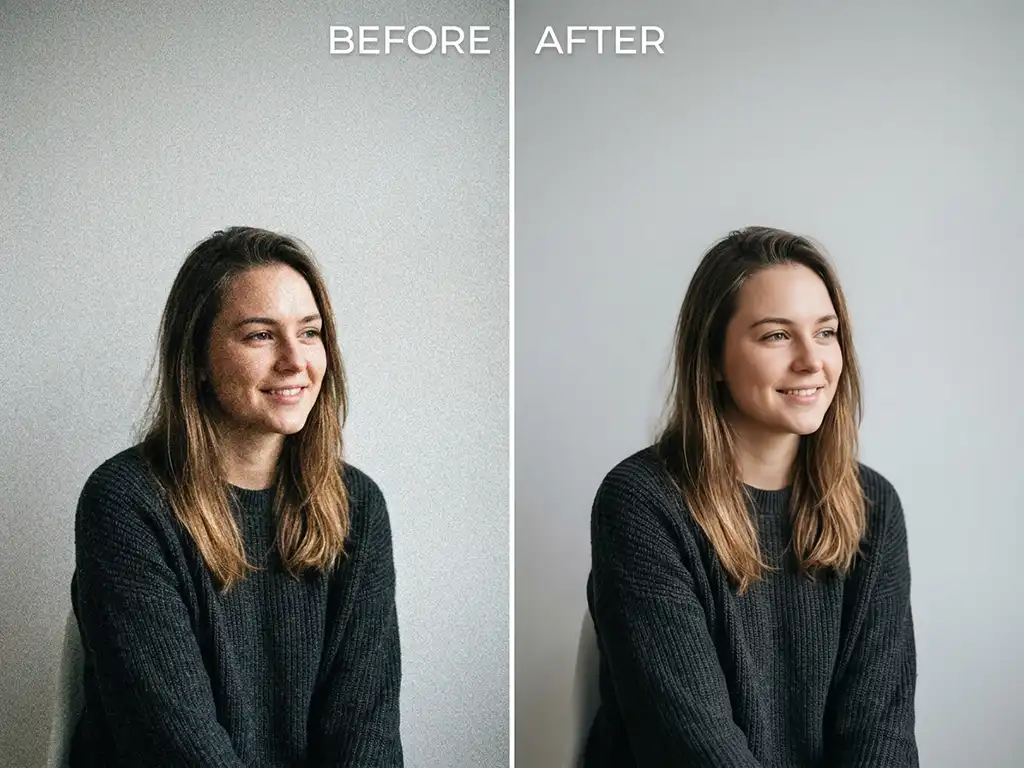
Luminance noise shows up as a fine, gritty texture spread across the brightness channel of the image. It is most visible in areas that should appear smooth — skies, backgrounds, shadow regions, and clean product surfaces.
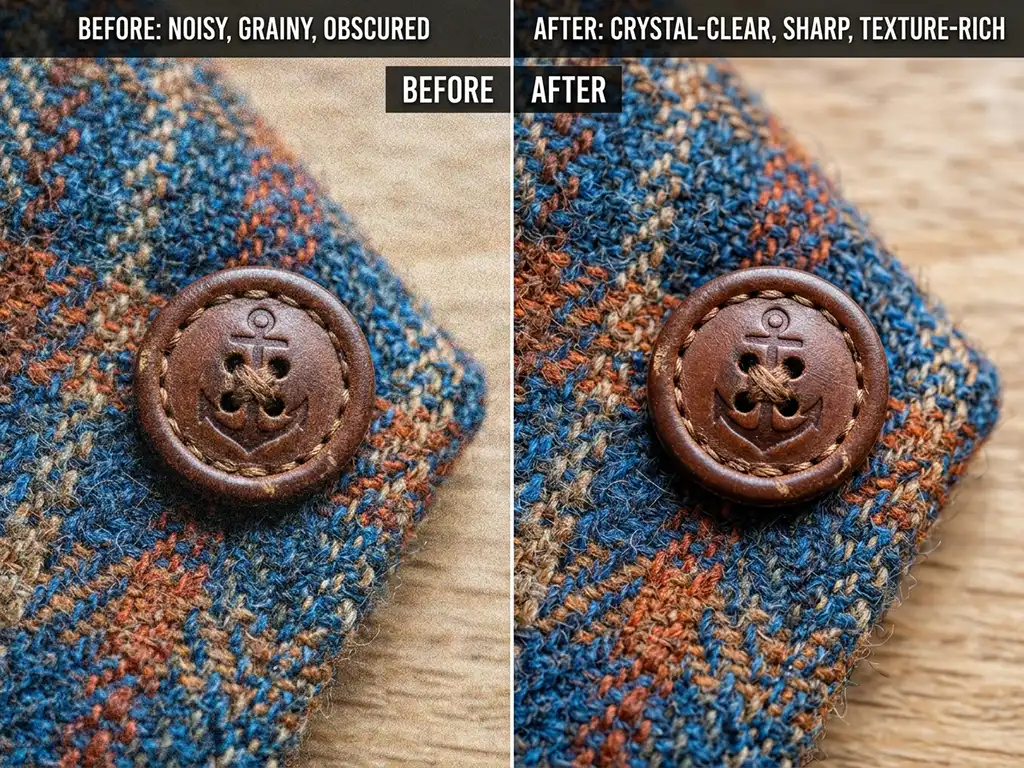
Correcting luminance noise requires carefully balancing the reduction level against the natural texture of the subject. A smooth studio background needs a more aggressive correction than a close-up of a wool sweater, where texture is part of the product. We approach each image by identifying which areas need smoothing and how much, rather than applying a single global reduction that averages across the whole frame.
Color (Chroma) Noise Reduction
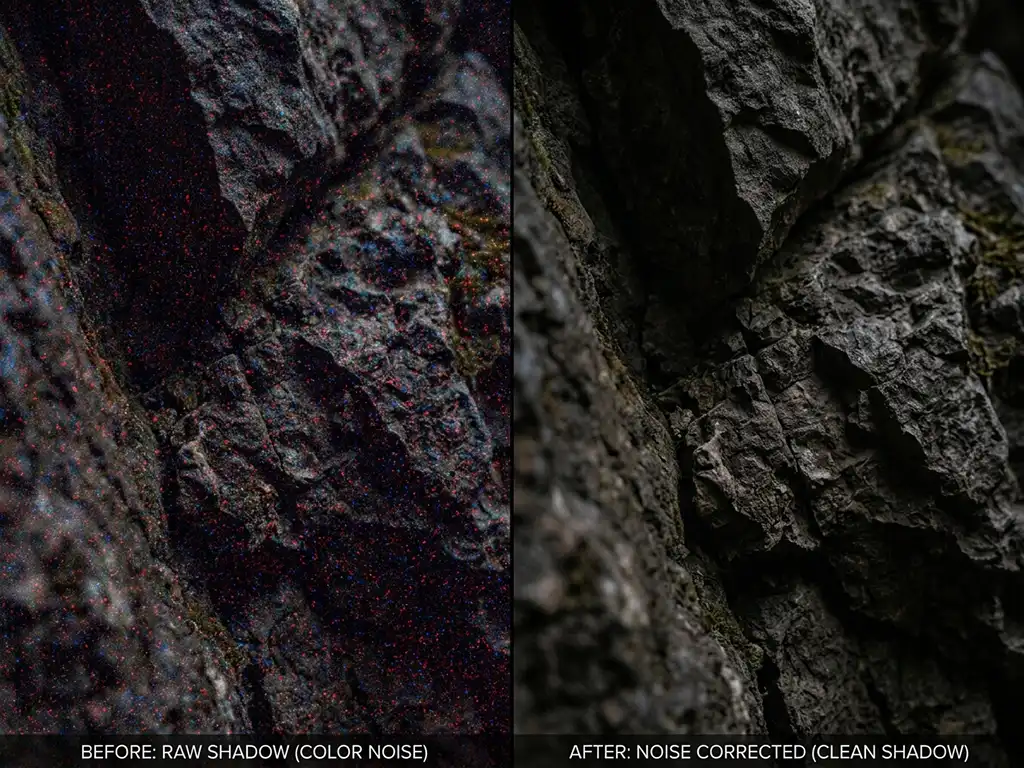
Color noise produces clusters of mismatched color pixels — typically red, blue, or green — in shadows and darker mid-tones. It is common in JPEGs shot at high ISO and in RAW files from cameras with smaller sensors.
Chroma noise is corrected by targeting the color channel independently of the luminance channel, which preserves the sharpness and fine detail in the brightness information while neutralizing the random color variation. This separation is one reason manual correction in Lightroom or Photoshop consistently outperforms one-click automated denoise tools, which process both channels together and often blur the image in the process.
Selective Noise Reduction
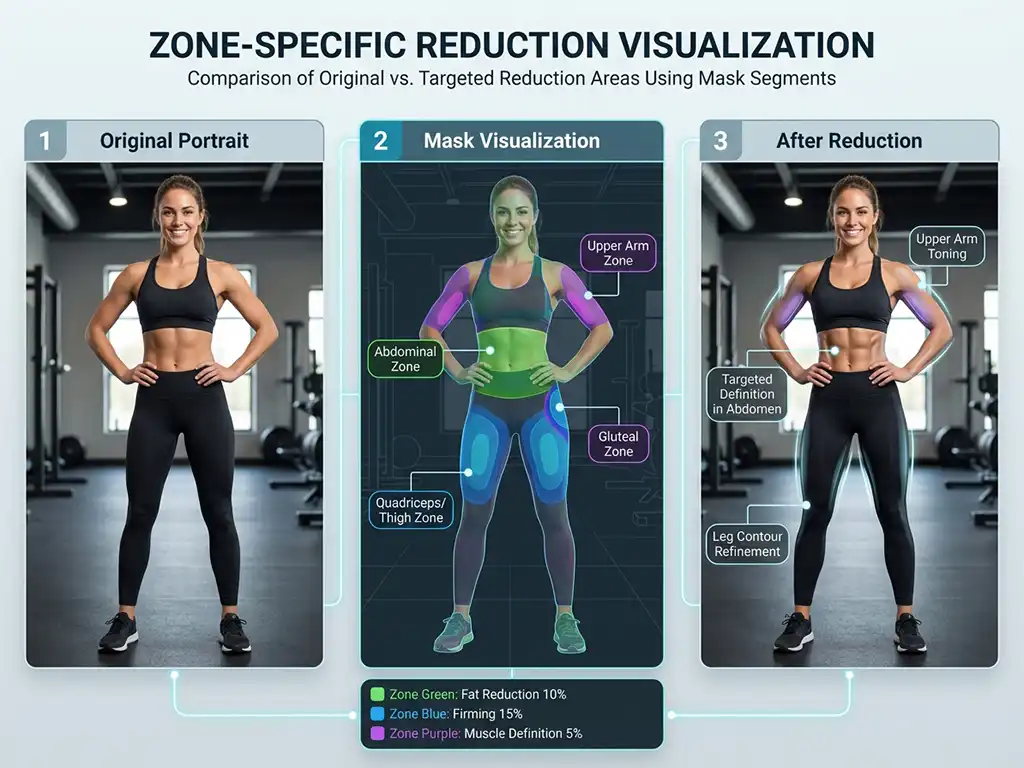
Not every part of a photo needs the same treatment. A portrait shot at ISO 3200 might have significant noise in the dark background but acceptable grain in the subject’s skin — and aggressive global denoising would flatten both equally, removing detail where it matters.
Selective noise reduction applies corrections by zone: heavier smoothing in plain backgrounds and shadow areas, lighter correction in mid-tones, and no reduction in areas where texture is real and intentional. This technique requires masking and layer-based editing to isolate specific regions of the image — it is not something batch processing can replicate.
Layer-Based Noise Reduction
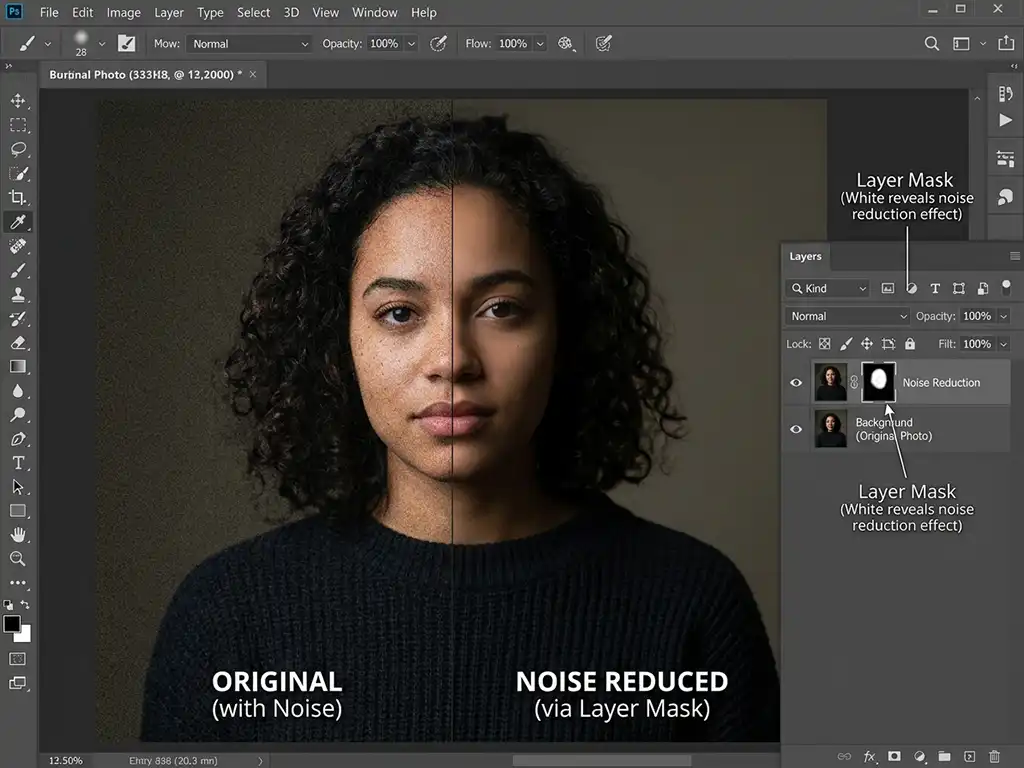
Layer-based noise reduction in Photoshop allows an editor to apply corrections on a separate layer and control their opacity, blending mode, and mask precisely. This method is particularly useful for images where a subject needs to retain sharp edge definition while the surrounding area is smoothed — common in product photography and architectural interiors.
It also allows non-destructive editing, meaning the original pixel data is preserved throughout the correction process. If a review reveals that the correction needs to be pulled back or adjusted, the editor can do so without regenerating the edit from scratch.
Industries We Serve
Clarity Edit’s sharpen image service is built for teams and businesses that produce images at volume and cannot afford inconsistent results.

Ecommerce Businesses
Product photos shot in studio conditions often look clean at first glance. But when a brand is shooting hundreds of SKUs, some shots will use higher ISO settings to compensate for varied lighting setups — particularly for smaller items photographed on lightbox setups where the sensor is working harder. That grain becomes visible at full resolution and can make catalog images look inconsistent or under-produced.
We batch-process ecommerce images with consistent noise correction applied across the full catalog, so every product image in a set reads at the same quality level. Ecommerce image editing that includes noise reduction from the start reduces the number of corrections needed downstream.
Professional Photography
Wedding, portrait, and event photographers regularly shoot in venues where flash is restricted, ambient light is dim, and ISO settings climb quickly. A ceremony in a candlelit church, a reception on a dark dance floor, or a portrait session at golden hour can all produce images with significant noise — especially in shadow areas.
Professional image denoising applied across an entire gallery keeps the batch consistent before any individual retouching begins. Sending noisy source files to a retoucher adds friction to their workflow and can result in retouching that looks inconsistent once the noise underneath is eventually corrected. Getting noise reduction done first, as part of the basic image adjustments layer, saves time at every subsequent stage.
Fashion Brands
Look-book and catalog photography for fashion brands often involves location shoots, natural light, and conditions that photographers cannot fully control. Images shot outdoors at dusk or in showrooms with mixed lighting frequently carry noise that needs correction before any color or retouching work begins.
For fashion brands where color accuracy is critical — a customer who receives a garment in a different shade than what the photo showed is a return waiting to happen — noise correction is also part of ensuring the color channel reads accurately. Chroma noise can shift the apparent color of fabric, particularly in darker tones.
Creative and Marketing Agencies
Creative and marketing agencies often receive raw assets from photographers, clients, or stock libraries that need correction before they can be used in campaigns. A batch of product images for a paid social campaign or a set of editorial photos for a brand look-book may all arrive with varying levels of noise depending on the conditions they were shot in.
Agencies need that variation removed before the images go into layout or production — not after. We integrate into agency workflows with fast turnaround and consistent output that meets brand standards without requiring in-house editing capacity.
Real Estate Companies
Interior real estate photography typically involves HDR blending from multiple exposures, which can introduce noise artifacts in shadow areas if the source files are not corrected first. Rooms with limited natural light often require higher ISO settings to capture ambient detail, resulting in grainy shadow regions that need reduction before the image is ready for blending or virtual staging.
Our real estate photo editing services build directly on this foundation — professional real estate photo editing that includes exposure-balanced, noise-corrected source images produces cleaner results at every stage that follows.
Our Noise Reduction Workflow
Every project follows the same structured process, designed to deliver accurate results the first time.
Upload Your Images
Send your photos through our secure upload system using your preferred transfer method — WeTransfer, Dropbox, Google Drive, or our direct upload portal. Include any reference notes about the level of correction you need, specific areas of concern, or images you want to use as a consistency reference for the batch.
We accept JPEG, PNG, TIFF, PSD, and all major RAW formats including CR2, NEF, ARW, and DNG. If you are sending RAW files, let us know your target output format at the time of upload.
Requirement Analysis
Before any editing starts, an editor reviews your files and your brief. For bulk batches, this step confirms that the approach is correct for the full set — not just the first few images. If there is anything in your instructions that needs clarification, we ask before starting rather than after.
This review also identifies any images where noise correction alone is not enough — for example, where exposure or white balance issues are present that will affect how the noise is corrected. We flag those upfront so the edit is sequenced properly.
Manual Editing
An editor corrects each image individually in Photoshop or Lightroom, applying luminance and chroma noise reduction by zone, protecting areas where texture is genuine, and adjusting the correction level based on the specific noise pattern in each frame.
For large batches, a lead editor sets the correction standard against a sample set first. That standard is then applied consistently across the full batch, with spot checks throughout to catch any frames that need different treatment.
Quality Check & Delivery
A second editor reviews the completed batch against the original files before anything is sent. They check for consistent correction across the set, over-smoothing in detail-critical areas, color accuracy in the chroma channel, and any images that need adjustment.
Delivery is in your requested format — JPEG, PNG, TIFF, or layered PSD — with a clear file naming structure that matches your original uploads. If you want revisions on any image after delivery, request them and they will be handled without additional charge.
Benefits of Professional Noise Reduction
- Detail is preserved, not sacrificed — manual correction distinguishes between grain and genuine texture, so sharp edges, fine fabric detail, and product surface texture are not smoothed out along with the noise
- Consistent correction across large batches — every image in a gallery or catalog is corrected to the same standard, not a slightly different level depending on how the automated tool interpreted each frame
- Better results at every subsequent editing stage — retouching, color grading, and HDR blending all produce cleaner outcomes when the source images are free of noise
- No plasticky, over-processed look — the goal is a natural result that holds up at full resolution and print size, not the over-smoothed, artificial look that aggressive automated denoising creates
- Scalable without quality drop — the same standard of correction whether you send 10 images or 10,000, with turnaround times confirmed upfront
- Format flexibility — RAW files are accepted and processed with full non-destructive editing, with delivery in whichever format your workflow requires
- Supports downstream workflows — noise-corrected files go directly into retouching, compositing, or publishing pipelines without additional correction steps

Related Services
- Color Correction — corrects inaccurate hues, inconsistent tones, and color cast issues across a full batch. Applied before noise reduction in the editing sequence.
- White Balance Correction — removes orange or blue color casts caused by mismatched lighting conditions. The starting point before noise reduction and color work.
- Exposure Adjustment — corrects underexposed or overexposed images by recovering shadow and highlight detail. Applied before noise reduction.
- Sharpen Image — restores edge definition and fine detail after noise reduction is complete. Sharpening is always applied last to avoid amplifying corrected grain.
- Ecommerce Image Editing — full product photo workflow including noise correction, color accuracy, background removal, and platform-specific resizing.
- Real Estate Photo Editing — HDR blending, sky replacement, and virtual staging built on correctly exposed, noise-corrected source images.
Frequently Asked Questions
Luminance noise shows up as grainy texture in the brightness information of the image — it makes areas that should look smooth appear rough or speckled, similar to film grain. Color noise (also called chroma noise) shows up as random red, blue, or green pixels clustered in shadows and dark mid-tones. Both types are corrected separately: luminance noise is addressed through the brightness channel, and chroma noise is corrected in the color channel. Treating them independently allows the editor to reduce noise without flattening sharpness or shifting the color of the image.
It can — if applied too aggressively or without regard for where texture should be preserved. Over-denoising is one of the most common mistakes in automated noise correction, and it produces the waxy, plastic-looking result that makes heavily processed images look unnatural. Manual editing avoids this by adjusting reduction strength by zone: more aggressive correction in plain backgrounds and smooth surfaces, lighter correction in areas where texture is part of the subject. Sharpening, which is applied after noise reduction, restores edge definition without re-introducing the grain.
Noise reduction is applied after exposure and white balance corrections are complete, and before sharpening. This sequence is important for two reasons. First, correcting exposure and white balance first gives the editor an accurate view of how much noise is actually present — an underexposed image that has been brightened shows significantly more noise than the same image exposed correctly in-camera. Second, sharpening amplifies whatever texture is present in the image, including noise. Applying sharpening before noise reduction makes the grain harder to remove cleanly. Getting the order right produces a cleaner result at every step.
There is no universal threshold, because noise visibility depends on the camera sensor, file format, and final output size. On a modern full-frame DSLR or mirrorless camera, images shot at ISO 800 to 1600 may show manageable noise, while ISO 3200 and above will almost always need correction — particularly in shadow areas. Cameras with smaller sensors, such as crop-sensor DSLRs and mirrorless systems, tend to show visible noise at lower ISO settings. If you are unsure whether your images need correction, send a sample file for our free trial and we will give you a clear answer.
Yes. Selective noise reduction using layer masks in Photoshop allows an editor to apply correction to specific areas of the frame — heavier smoothing in the background and shadow regions, lighter or no correction in areas where texture is real and should be retained. This is particularly useful for portraits where the background needs smoothing but the subject’s skin and hair need to keep their natural detail, and for product shots where the item needs to hold its surface texture while the surrounding area is cleaned up.
Yes, and RAW files respond better to noise reduction than JPEGs do. When a camera saves a JPEG, it applies its own internal compression and noise reduction, which can make further correction harder without introducing artifacts. RAW files preserve all the original sensor data, giving an editor more information to work with and more precise control over the correction. We accept all major RAW formats including CR2 (Canon), NEF (Nikon), ARW (Sony), and DNG, and deliver in whichever format your downstream workflow requires.
They address different problems and are often both needed. Noise reduction removes grain and color speckling — it smooths areas that should look clean. Sharpening restores edge definition and fine detail — it makes areas that should look crisp appear crisper. If your images look grainy or textured in areas that should be smooth, they need noise reduction. If they look soft or slightly blurry, they may need sharpening. Many images need both, applied in the correct sequence: noise reduction first, then sharpening. Our editors assess each file individually and apply whichever corrections are appropriate based on what the image actually shows.
Yes, though JPEG compression introduces its own artifacts — particularly the blocky patterns called compression artifacts that appear around high-contrast edges. Noise reduction applied to a heavily compressed JPEG can reduce grain, but compression artifacts require a different correction approach. If your files are compressed JPEGs and you are concerned about visible artifacts, mention it in your upload notes. Our editors will assess the file and let you know what is achievable before the edit begins.
Yes. We edit two sample images at no cost so you can evaluate the quality of the correction — detail preservation, smoothing level, color accuracy — before committing to a full order. No payment information is required for the trial. Submit your samples at our free trial page and we will return the corrected files with notes on what was adjusted and why.
Before starting a large batch, the lead editor establishes a correction reference using a sample set drawn from across the full submission — not just the first few images. That reference standard is applied throughout the batch, with spot checks at regular intervals to catch frames that deviate from the established level. A second editor reviews the full set against the original files before delivery, checking for consistency, missed corrections, and over-smoothing in any individual images. The goal is a batch that reads as a single edited body of work rather than a set of individually adjusted files.
Have a project in mind?
Send us your images and editing requirements. Our team will review the files, recommend the right editing approach, and provide a custom quote. You may also test our quality with eligible sample images before placing a paid order.