
Table of Contents
Restore Old Photos: The Complete DIY and Professional Guide
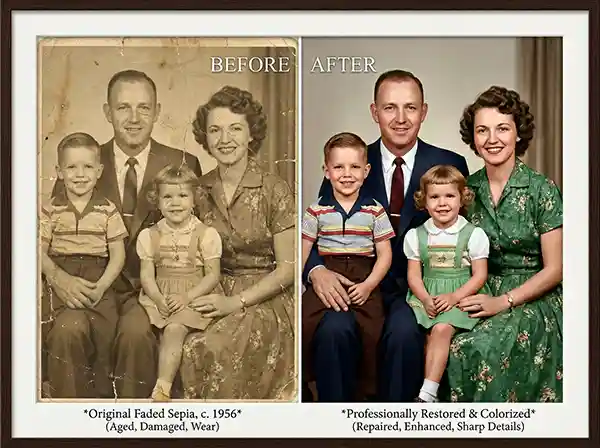
Is there an old, fading photograph in your home that you dread losing forever? Every old photograph carries something no second chance can recreate. The faces in a 1960s family portrait, the grain of a black-and-white wedding print from the 1970s, the color of a child’s dress in a faded snapshot from decades ago. When those images begin to crack, yellow, or disappear entirely, the loss feels permanent. It does not have to be.
Photo restoration has changed significantly in the last few years. The combination of AI-assisted tools and skilled professional editing has made it possible to recover images that once would have been considered beyond repair. But the process is not as simple as uploading a file and clicking a button, and not every photo needs the same approach. This guide covers the full picture: how damage happens, what your realistic options are, how to execute a proper restoration yourself, and how to decide when it is worth handing the work to a professional.
Understanding the Damage Before You Touch the Image
The most common mistake people make with photo restoration is treating all damage as the same problem. It is not. Different types of deterioration respond to different methods, and misidentifying the issue leads to poor results or, worse, to overwriting detail that was still recoverable.
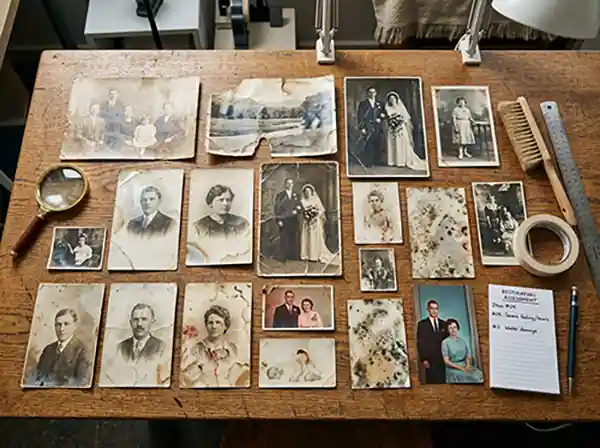
Surface damage includes dust, fingerprints, scratches, and light scuffs. These sit on top of the image and can usually be handled well by AI tools because the underlying image data is still intact. The tool is filling in small gaps rather than reconstructing lost information.
Chemical and environmental fading occurs when dye or silver compounds in the print break down over time. Colour photos fade unevenly, often shifting toward orange or yellow as cyan dyes deteriorate first. Black-and-white prints can silver-mirrored (a condition called silver mirroring) or develop brownish tones from oxidation. This type of damage requires colour and tone correction that goes beyond a simple filter.
Physical damage covers tears, folds, missing corners, and water or mould damage. This is where the distinction between AI and professional restoration matters most. A crease running through a face, a water stain that has destroyed fine detail, or a section of the photograph that has simply peeled away cannot be convincingly reconstructed by an automated tool. The missing information has to be rebuilt using artistic judgment.
Adhesive and album damage is frequently underestimated. Many old photographs were mounted in albums using rubber cement or pressure-sensitive adhesives that transferred chemical residue to the image surface. In some cases, the print was stuck directly to an album page and removing it damaged the emulsion. If your photo came from an old album and has grid-like pressure marks or surface loss on the edges, it likely has adhesive damage in addition to whatever environmental aging occurred.
One practical step before you begin any digital work: examine the physical print under a strong raking light (a lamp held at a low angle to the surface). This reveals surface texture, raised damage, and areas of missing emulsion that are not obvious in a flat scan. It also helps you understand what the digital image will show once scanned.
How to Properly Digitise a Damaged Photo
This step is consistently skipped or rushed, and it often determines whether the restoration is successful. A poor-quality scan puts a ceiling on everything that follows.
Use a flatbed scanner, not a phone camera
Smartphone cameras introduce lens distortion, uneven lighting, and compression artefacts that complicate restoration. A flatbed scanner captures the image with even illumination and no perspective distortion. For a standard 4×6 print, scan at a minimum of 600 DPI. For smaller prints, wallet photos, or images you plan to print large after restoration, scan at 1200 DPI or higher.
Always scan in colour, even for black-and-white photographs
Black-and-white prints often contain warm or cool tone information in the silver layer that a colour scan captures and a greyscale scan discards. This gives you more flexibility during restoration and avoids permanently locking in a flat grey interpretation of what might have been a warmer sepia or cooler neutral-tone original.
Save the scan as a TIFF, not a JPEG
JPEG compression introduces artefacts, and every time you re-save a JPEG file, those artefacts compound. A TIFF file preserves all the data without lossy compression. If TIFF is not available on your scanner, use the highest-quality JPEG setting and plan to work on a copy rather than the original scan.
Never write to the original file
Keep the raw scan untouched in a separate folder. Every edit should happen on a duplicate. This is not a formality; it is a safety net. If a restoration takes a wrong turn three hours in, the original scan is still there.
DIY Restoration: A Step-by-Step Workflow
If the damage is moderate, including scratches, dust, light fading, and minor colour shifts, learning how to restore old photos yourself using software like Adobe Photoshop, Affinity Photo, GIMP, or Photopea can produce excellent results.
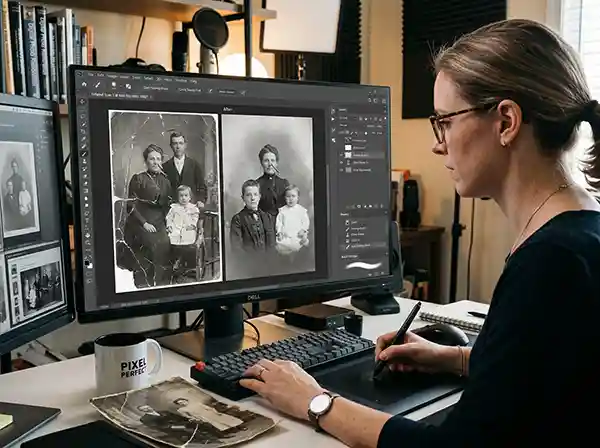
1. Address major structural damage first
Open the scan and zoom to 100% to assess what you are working with. Before any colour or tone correction, remove large tears, missing areas, or prominent creases. In Photoshop, the Patch Tool and Content-Aware Fill work well for areas where surrounding texture is consistent (a plain background, a smooth wall). For damaged areas over complex content like faces or clothing, manual clone-stamping from nearby reference areas produces more believable results. Work on this before colour correction because your tone adjustments will shift the look of cloned patches.
2. Correct tone and exposure
Old photographs almost always have crushed blacks or washed-out highlights. Use Levels or Curves to restore full tonal range. Pull the black point to where the actual darkest tone in the image begins, and bring in the white point to where the highlights sit. This alone dramatically improves perceived sharpness and depth, without touching any sharpening tool.
3. Address colour shifts
For colour photographs, compare the image to reference points you know the colour of: white paper in the scene, a grey card, or skin tones. Use the White Balance or Selective Colour tools to neutralise the dominant colour cast. For heavily faded prints that have gone predominantly warm, reduce yellows and reds in the shadows independently from the highlights, since fading often affects tonal ranges differently.
For black-and-white prints, decide at this stage whether to keep the image as a neutral grey or warm it slightly. Neutral grey suits documentary or historical photographs. A slight warm tone is often more sympathetic for family portraits from the 1950s through 1970s.
4. Clean fine surface damage
Once the tone is correct, go after dust spots, small scratches, and speckles using the Healing Brush or Spot Healing Brush. Work systematically across the image at 100% zoom, moving from left to right so you do not miss areas. This is time-consuming and cannot be reliably automated for a heavily damaged image. AI tools can help here but often introduce slight blurring around healed spots, which compounds if you apply them across an entire image.
5. Sharpen with restraint
This is where most DIY restorations go wrong. Film photographs have a natural grain structure, and over-sharpening replaces that organic texture with harsh, artificial edge halos. Use Unsharp Mask at a low amount (15 to 25%), a radius of 1 to 1.5 pixels, and a threshold of 2 to 4 levels. Apply sharpening only after all other adjustments are done and only to a flattened or stamped composite layer, not to individual layers mid-workflow.
AI Tools: What They Do Well and Where They Fall Short
Several free and low-cost AI tools have made it incredibly easy to restore old photos with basic enhancements accessible to anyone. They are worth understanding clearly, both for their genuine utility and for their significant limits.
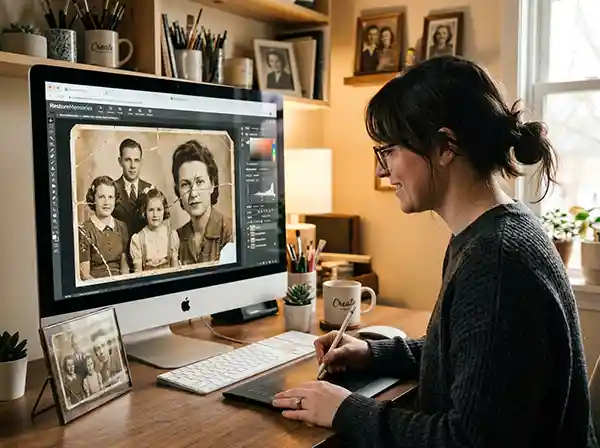
PixelBin offers a free browser-based restoration tool that handles dust removal, scratch repair, and basic sharpening. Its batch processing mode is genuinely useful if you have a large number of mildly damaged photos from the same era. The side-by-side preview before downloading is practical. It works best on prints with surface damage and minor fading, not on physically torn or heavily deteriorated images.
CapCut’s AI restorer is quick and requires no account. It applies a single-pass enhancement that improves apparent sharpness and lifts faded tones. Its face enhancement feature can improve soft or faded facial features but also has a tendency to normalise faces toward current appearance norms, which can make a 1940s portrait look subtly modern. Use it with awareness.
Canva’s restore function is convenient if you are already working in Canva for design purposes, but it offers less granular control than dedicated tools and is not suited for serious restoration work.
A word of caution about AI colorisation tools specifically: when an AI tool converts a black-and-white photograph to colour, it is making an educated statistical guess about what colours were present. Clothing, upholstery, wall paint, and hair dye were not fed into the model. The algorithm assigns plausible colours based on patterns learned from other photographs. The result can look convincing but may be historically inaccurate. For family photographs where accuracy does not matter, this is fine. For historical images where it does, the colourised version should be labelled clearly and the black-and-white original preserved.
When to Hire a Professional Restoration Service
Some photographs simply need human skill. The situations that justify professional restoration are relatively specific.
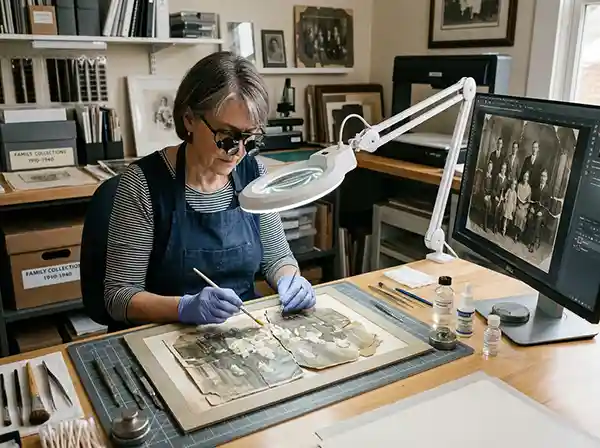
Major physical damage
A tear through a face, a section of image completely missing, or a photograph that has been folded and unfolded so many times that the image layer has flaked away requires reconstruction by someone who understands how to build back facial features, clothing folds, or architectural detail that no longer exists in the scan. AI tools cannot reliably do this. The reconstruction relies on artistic judgment informed by the surrounding context.
High sentimental or historical value
If the photograph is the only surviving image of a person, a place, or an event, the stakes of a poor restoration are higher than the stakes of spending on a professional. A free AI tool that oversmooths skin or guesses the wrong colour for a grandmother’s dress is a problem you cannot undo if you have overwritten the original.
Volume with consistency requirements
If you have a collection of 50 to 100 family photographs from different decades that you want to restore and print for an anniversary or archive project, maintaining consistent tone, colour treatment, and print quality across the set is genuinely difficult to do yourself. A professional service handles this as part of their standard workflow.
Unusual damage types
Water damage that has caused dye transfer between stuck-together prints, mould that has degraded the emulsion layer, or silverfish damage (insects that consume the gelatin layer of old prints) all present problems that require careful manual work to address without destroying adjacent detail.
When evaluating a professional service, ask to see before-and-after examples of work that matches your type of damage. Ask whether they retain a copy of your image after delivery (a relevant data privacy question many people forget to raise). Ask whether they work from your original scan or require you to ship the physical print.
Pricing for professional restoration typically ranges from around $20 to $60 per image for standard repair work, with pricing increasing for major reconstruction. The variation depends on the extent of damage and the complexity of reconstructed areas. Services that quote per-image pricing with upfront previews before payment offer the most transparent arrangement.
Expert Tips That Most Guides Skip
A few practical points that consistently make a difference but rarely appear in standard restoration guides.
Handle physical prints with cotton gloves, not bare hands
Skin oils accelerate deterioration and can leave permanent fingerprint marks on old prints. Even if you are scanning and putting the print away immediately, gloves matter.
Calibrate your monitor before doing colour correction
Every monitor displays colour differently. If your screen is warmer or cooler than a calibrated standard, your colour corrections will look right on your screen and wrong everywhere else. Basic calibration using the operating system’s built-in tools, or a hardware calibrator if you are doing this regularly, removes a variable that otherwise produces inconsistent results.
Preserve your original scan in an archival format
Once you have a TIFF scan, store it in at least two separate locations: a local drive and a cloud backup. Do not rely on a single external hard drive. Drives fail. For a photograph of significant personal value, a redundant backup is not excessive.
Consider whether you actually want to colourize
Black-and-white photographs from a specific era have a documentary integrity. Colourising changes the viewer’s experience of the image in ways that are not always improvements. Many people who request colourisation regret it when they see the result because the colour distracts from the people in the photograph. It is worth thinking about before committing to it.
Batch AI processing on large collections introduces consistency problems
Different AI passes of similar photographs will produce slightly different tonal treatments because the model is responding to each image individually. If you are processing a large collection that needs to feel visually unified, either process all images manually or choose one AI setting and apply it consistently, then do a final pass comparing images side by side.
Choosing Your Path Forward
The decision between DIY restoration and professional help is not about skill level alone. It is about what the photograph is worth to you and what the damage requires.
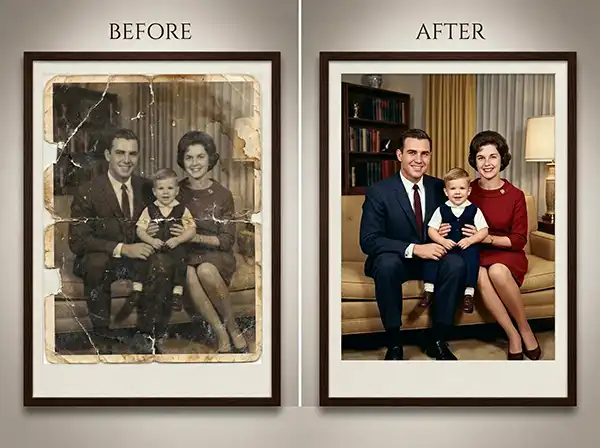
Start by scanning your photograph at high resolution and examining it carefully. Surface damage, light fading, and minor colour shifts are well within reach of AI tools and basic Photoshop work. Structural damage, missing image areas, or any photograph that you cannot afford to restore incorrectly should go to a professional.
If you are dealing with a collection rather than a single image, a professional service offers consistency and efficiency that would take you considerably longer to achieve yourself. For businesses working with product photography or commercial image archives, that operational argument is even stronger.
The most important thing is not to let urgency push you into a poor-quality restoration. A photograph that has survived 50 years will survive a few more days while you make a careful decision about how to approach it.
At Clarity Edit, we work with restoration requests that range from single family photographs to large commercial archives. If you would like a professional assessment of what your images need, get in touch for a free quote and we will look at what is genuinely achievable before any work begins.
Frequently Asked Questions
Not always to perfection. Photographs with large missing sections, severe mould damage that has consumed the image layer, or prints that have been exposed to water for extended periods may have lost image data that cannot be reconstructed without inventing content. Good restoration is honest: it recovers what is genuinely there, and where content must be reconstructed, it does so in a way that is sympathetic to the original rather than adding detail that was never present.
Yes. Always scan in colour. Black-and-white prints contain tone information in the silver layer that a colour scan captures. You can always convert to greyscale later, but you cannot recover colour channel data from a greyscale scan.
For standard work, most services quote 24 to 72 hours per image depending on the complexity of damage. Severely damaged images requiring extensive reconstruction may take longer. If you have a deadline (a family reunion, a birthday, a memorial), communicate that clearly upfront and confirm the turnaround before placing an order.
For photographs of significant sentimental or historical value, yes. The question to ask is: what would it cost to replace this? For a photograph of a grandparent at their wedding, the answer is that it cannot be replaced at any cost. In that context, a $40 to $60 professional restoration is a straightforward decision.
This question comes up often but refers to a different process. Data recovery for deleted digital files is not the same as photo restoration. Deleted files on a device may be recoverable through specialised data recovery software (PhotoRec, Recuva, and similar tools) if the storage space has not been overwritten. This is separate from restoration of a damaged physical or digital photograph. If you are looking to recover deleted digital files, data recovery tools and services address that need.
Adobe Photoshop remains the most capable tool for serious restoration work, with the most precise control over each step of the process. Affinity Photo is a strong one-time-purchase alternative with comparable tools at a lower price. For simpler editing tasks or those looking for a free alternative, GIMP provides the essential functionality needed. AI-assisted tools like PixelBin work well for collections with surface damage and light fading.